
Unsightly cracks and holes in your ceiling can detract from the look of a room. Fortunately, you can often repair these problems yourself with the right materials and techniques.
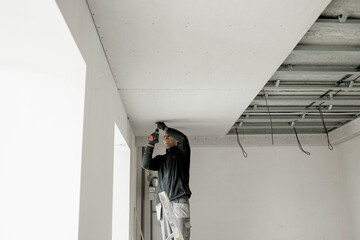
Before you start any repairs, make sure that the area is dry and that you are using a ladder that can safely support you. Also, use a dust mask and eye protection when working overhead. Professional Ceiling Repairs Perth is also a good alternative.
 Get the Right Tools
Unsightly cracks in the ceiling can be a major eye-sore. The good news is that if they’re not too bad, they can usually be repaired without calling in a professional. The key is to use the right tools and supplies to get the job done quickly and efficiently. Fortunately, most households already have the basic tools like a hammer, screwdriver, drill, and sandpaper on hand. Plus, a drywall repair patch and drywall compound are easily available at home improvement stores near you.
If the crack is only a hairline, it might be enough to simply apply a small amount of wallboard joint compound to the area and let it dry. However, if it’s loose and exposed to water, it might need extra reinforcement with mesh or paper drywall tape. This will help the compound bond directly to the plaster and prevent future cracks.
You might also need to cut an inspection hole before attempting a patch. This will let you see what is below the drywall and make sure you aren’t covering any electrical wires or plumbing pipes, which would require a licensed professional.
Be sure to wear a dust mask and goggles when working with drywall compounds. It’s also a good idea to have a step ladder on hand to avoid falling off the ceiling. Once you’re ready to begin, the area around the crack or damage must be clean and free of debris before applying a new coat of mud. You can either use setting compound or ready-mixed mud for this, but the former will yield better results. Either way, be sure to skim the mud with your drywall knife and remove any high spots or lumps once it dries.
Don’t Cheap Out
Unsightly cracks in the ceiling can detract from a room’s appearance, but they’re often easy enough to fix. It’s important to make sure you have the right materials for the job before getting started, however. Cheaper products may not hold up and could lead to further damage in the future.
To start with, you’ll need to have the right tools, such as a trowel for spreading plaster or joint compound and a ladder to reach the ceiling safely. You should also wear dust masks and eye protection when sanding to avoid inhaling any dust particles. Depending on the extent of the damage, you’ll need other supplies as well, such as a plaster patch or drywall spackle to fill in cracks and holes. You’ll also need primer, sandpaper, and paint to finish off the repair work.
Finally, you’ll need a flexible sealant such as Elastopatch to prevent the repaired crack from reappearing. This product can be applied directly over a cracked area or spackling and is available from most hardware stores.
If the damage is severe, it might be best to call in professionals. Not only will they have the tools necessary to do the job correctly but they’ll be able to offer advice on longer-term solutions that may not be possible with DIY methods. They will also be able to provide a warranty on their work, giving you peace of mind that the job has been done to the highest standards. A professional can also help you assess the cost of the project before getting started, so you’ll have a clear idea of what to expect in terms of final costs. This will give you the confidence to budget effectively for the project and avoid any surprises down the line.
Get the Right Materials
Having the right materials on hand is vital when tackling ceiling repairs. Having the right tools and supplies ensures that you can properly assess the damage and decide on the best strategy for repair. This will also help you avoid wasting time and money by using the wrong materials or methods.
If you’re working with drywall, make sure that you have safety glasses and a dust mask to prevent inhaling harmful particles during the repair process. You will also need a ladder that’s sturdy and stable to safely reach the area in question. Before removing water-damaged drywall, place down a tarp or drop cloth to catch any falling debris and to protect the floors below. Next, puncture the drywall in the affected areas to release the moisture and dry out the space.
When it comes to repairing holes, you can use either a simple drywall patch kit or a square piece of new drywall. Either way, apply two coats of mud to the hole, sanding after each coat, and priming the patch before painting.
For cracks, you can use drywall compound or Spackle. If the crack is hairline, you can get away with applying a thin coat of a flexible film that stretches and contracts along with the crack for a more long-lasting fix.
If you have larger cracks, you’ll need to tape and mud the area. For best results, use mesh tape over the crack. It helps the mud bond directly to the plaster and prevents future cracking. If the crack is structural, you may need to add support beams to prevent it from worsening. It’s important to identify and address structural damage as soon as possible to avoid further damage and potentially unsafe conditions.
Know Your Limits
Unsightly drywall cracks in the ceiling can detract from the look of a room and sometimes can be an early warning sign for water leaks that need to be addressed. However, this type of damage can often be repaired on your own. Before getting started, make sure you know what your limits are and have a clear understanding of the type of damage you’re dealing with.
For example, if your ceiling is leaking water and you want to repair it on your own, make sure that you’ve cleared the area above the leak and have adequately dried it out with a fan (or even better, use a moisture detector to monitor your ceiling for issues before they become serious). Additionally, it’s important to be aware of what lies beneath the leaking spot and to protect anything below by placing towels or gallon buckets underneath.
On the other hand, if you’re dealing with an extensive ceiling crack that covers a large portion of your ceiling, it may be time to call in a professional to help you out. Not only is a cracked ceiling unsightly, but it’s also a potential risk for falling debris and can lead to significant structural damage if not addressed quickly.
Additionally, if your ceiling is covered in mold or contains asbestos, you will likely need to bring in a pro. Asbestos was frequently used in older homes in textured popcorn ceilings to reduce sound travel and as a fire retardant, but if you have one of these ceilings, you must have it professionally tested before attempting any repairs or painting.